This walk through creates a simple PowerBI MVC app that can embed reports. It uses the App-Owns data model popular for use by ISV’s.
Make sure the account you’re using is a Power BI Pro account. You’ll need a Pro account to do embedding.
Register an Azure AD app
First, we need to get the app we’re going to build registered with Active Directory. Login to PowerBI and go here:
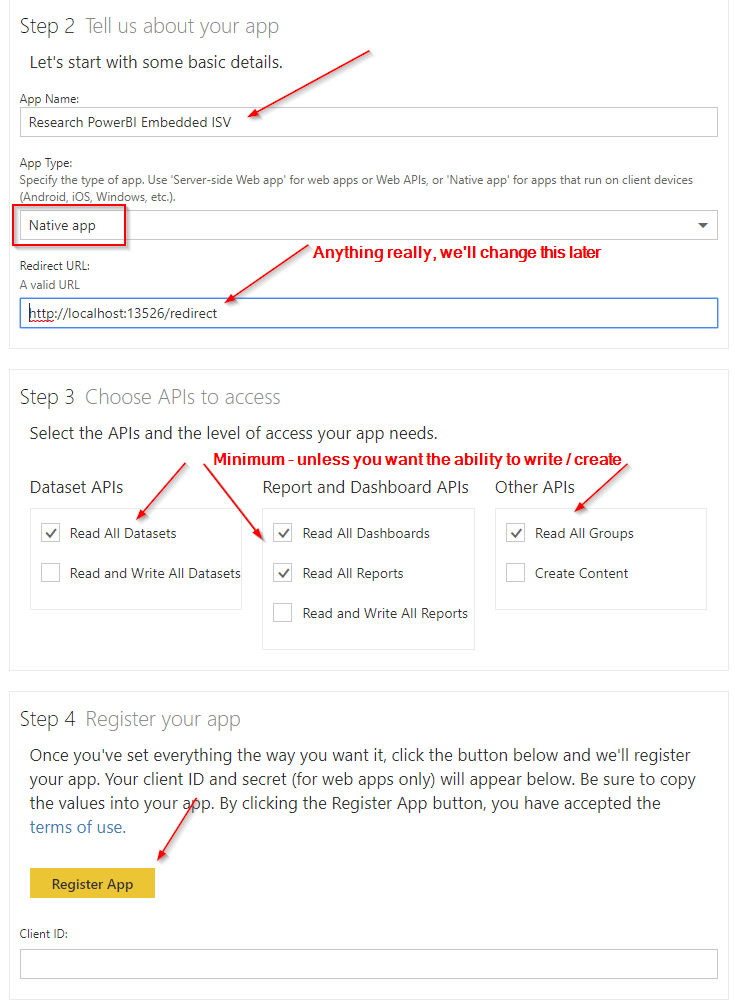 Make sure to select Native app. Even though we’re embedding to a web page we still need to select Native app. ‘Server-side Web app’ is for something else.

Write down your Client ID. This is the same as what Azure calls the Application ID.
Apply Azure AD permissions
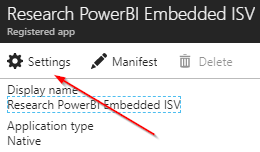
Your app will access the REST APIs via a master account. In order to do this the master account must be given permission. This is done by logging in to the Azure portal using the master account and going to Active Directory / App registrations. Make sure to select ‘All apps’ so you can see your embedded app.


We need to enable “Access the directory as the signed-in user”.
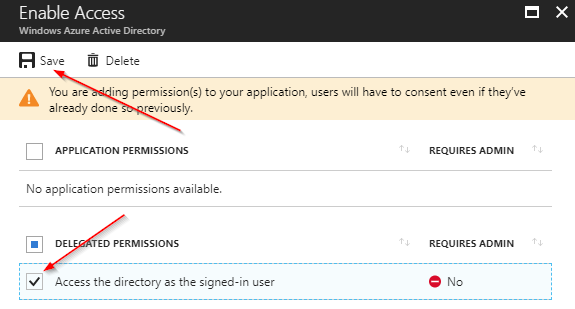
And finally, Grant those Permissions. The master account you’re logged in as now has those rights.

Power BI rights should automatically be configured when the app was registered. If not, click Power BI Service, select the necessary Permissions, Save, and Grant Permission for those as well.
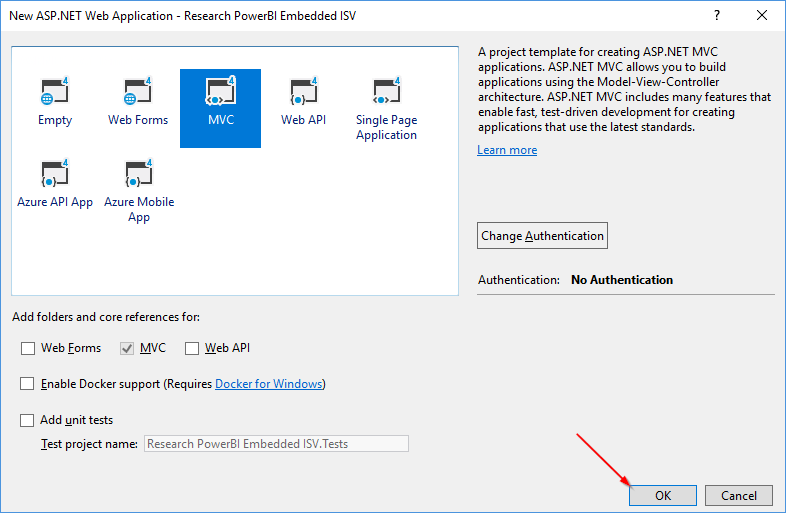
Create Web Project
Visual C# / ASP.NET Web Application (.NET Framework)

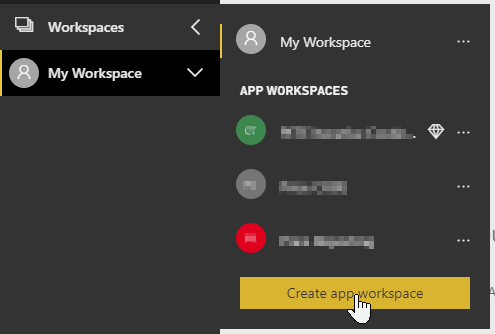
Create PowerBI App Workspace
This is where your PowerBI .pbix files will be uploaded to.


Get your Group ID GUID
Click on your new App Workspace to open it.
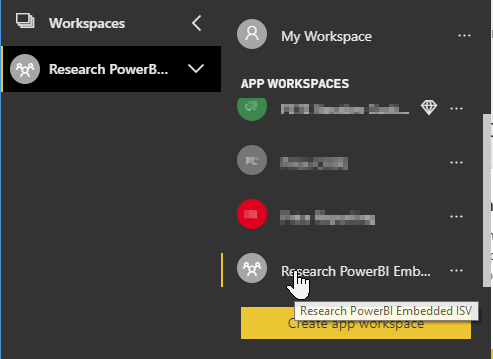
And copy the GUID from the Url. This is your Group Id (App Workspaces used to be called groups).

Publish a PBIX to your new App Workspace
I’ve always got a simple of simple PBIX lying around for testing. Mine’s called Colors.pbix. Feel free to download and rename (don’t extract, just rename) to Colors.pbix.
Open your PBIX, make sure your logged in under the master account, then Publish your file to your new App Workspace.

Setup Web.config
Use the Client ID you saved off during App Registration above to set “pbi.clientId”
Use the Group ID we got from creating our new App Workspace above to set “pbi.groupId”
Then use the master account’s credentials for “pbi.user” and “pbi.pass” (obviously encrypt your password or use something like KeyVault).
Start Coding
I won’t be organizing my code as one should in a real project but for Demo purposes it will do and make things easy peezy.
Setup your Project
Add a class to the Controller folder called EmbedManager.cs
Using NuGet install the following packages:
* Microsoft.IdentityModel.Clients.ActiveDirectory
* Microsoft.PowerBI.Api
Add some using statements & pull in your App Settings.
using System.Diagnostics;
using System.Configuration;
using Microsoft.IdentityModel.Clients.ActiveDirectory;
using Microsoft.Rest;
using Microsoft.PowerBI.Api.V2;
using Microsoft.PowerBI.Api.V2.Models;

public class EmbedManager
{
    private static readonly string _authUrl = ConfigurationManager.AppSettings["oauth.authorize"];
    private static readonly string _resourceUrl = ConfigurationManager.AppSettings["pbi.resource"];
    private static readonly string _apiUrl = ConfigurationManager.AppSettings["pbi.api"];

    private static readonly string _clientId = ConfigurationManager.AppSettings["pbi.clientId"];
    private static readonly string _groupId = ConfigurationManager.AppSettings["pbi.groupId"];

    private static readonly string _userName = ConfigurationManager.AppSettings["pbi.user"];
    private static readonly string _password = ConfigurationManager.AppSettings["pbi.pass"];
}
Get an Access Token
The first thing you need is an access token so you can make calls into the PowerBI REST API.
/// Get Token Credentials using the master accounts user/pass
public TokenCredentials GetTokenCredentials()
{
	UserPasswordCredential credential = new UserPasswordCredential(_userName, _password);
	AuthenticationContext authContext = new AuthenticationContext(_authUrl);
	AuthenticationResult authResult = authContext.AcquireTokenAsync(_resourceUrl, _clientId, credential).Result;

	if( authResult == null )
		throw new Exception("Unable to authenticate");

	return new TokenCredentials(authResult.AccessToken, "Bearer");
}
Since all Embedded functionality works through App Workspaces, all your REST API calls using the PowerBIClient wrapper need to use the InGroup version.
Let’s make our first call into the API to get a list of reports from the App Workspace we created.
public IList GetReports()
{
	using( var client = new PowerBIClient(new Uri(_apiUrl), GetTokenCredentials()) )
	{
		// The Embed API requires a Group so all calls must be 'InGroup'
		var reports = client.Reports.GetReportsInGroupAsync(_groupId).Result;
		Debug.WriteLine($"Report Count:{reports.Value.Count()}");
		foreach( var report in reports.Value )
			Debug.WriteLine($"{report.Name}, {report.EmbedUrl}");
		return reports.Value;
	}
}
(see below if you have any issues compiling at this point)
Add a call to GetReports() from the Controller:
public class HomeController : Controller
{
	public ActionResult Index()
	{
		EmbedManager em = new EmbedManager();
		em.GetReports();

		return View();
	}
}
RUN!
If you haven’t given your app the proper AD permissions you’ll see this:
{"error":"invalid_grant","error_description":"AADSTS65001: The user or administrator has not consented to use the application with ID 'b0cc996e-9a83-4bf0-874b-50f0454e9858' named 'Research PowerBI Embedded ISV'.}
See “Apply Azure AD permissions” above to give the correct permissions.
If all goes well, look at your Output window and you should see:
Report Count:1
Colors, https://app.powerbi.com/reportEmbed?reportId=1234-555-6789&groupId=3d36aa92-c1b0-434d-92a1-24ee3b67b039
That’s it! The hard parts done. Now all you have to do is embed the report!
Let’s do it…
Create a tiny class to hold just what you need for embedding.
public class EmbedConfig
{
	public string ReportId { get; set; }
	public string EmbedUrl { get; set; }
	public string EmbedToken { get; set; }
}
We’ll also want to get an Embed Token. Technically you can use your Access Token to embed the report, but don’t! That’s a security risk because anyone with that token could view other reports that token has access to. Instead, we want a report specific token that will expire.
public void GetEmbedToken(Report report)
{
	using( var client = new PowerBIClient(new Uri(_apiUrl), GetTokenCredentials()) )
	{
		var generateTokenRequestParameters = new GenerateTokenRequest(accessLevel: "view");
		EmbedToken tokenResponse = client.Reports.GenerateTokenInGroup(_groupId, report.Id, generateTokenRequestParameters);

		var embedConfig = new EmbedConfig()
		{
			EmbedToken = tokenResponse.Token,
			EmbedUrl = report.EmbedUrl,
			ReportId = report.Id
		};
	}
}
Update our HomeController
public class HomeController : Controller
{
	public ActionResult Index()
	{
		EmbedManager em = new EmbedManager();
		var report = em.GetReports().FirstOrDefault();
		if( report == null )
			throw new Exception("Ah! No report!");

		var config = em.GetEmbedToken(report);
		ViewBag.EmbedConfig = config;

		return View();
	}
}
Add use our EmbedConfig in the View to show the report.
@{
    ViewBag.Title = "Home Page";
}
(function () { var embedToken = ‘@ViewBag.EmbedConfig.EmbedToken’; var embedUrl = ‘@ViewBag.EmbedConfig.EmbedUrl’; var reportId = ‘@ViewBag.EmbedConfig.ReportId’; var iframe = document.getElementById(‘ifrTile’); iframe.src = embedUrl; iframe.onload = function () { var msgJson = { “method”: “POST”, “url”: “/report/load”, “headers”: { “x-sdk-type”: “js”, “x-sdk-version”: “2.3.2”, “uid”: “87oes” }, “body”: { “settings”: { “filterPaneEnabled”: true, “navContentPaneEnabled”: true }, “type”: “report”, “tokenType”: 1, /* 0 for Access Token */ “accessToken”: embedToken, “embedUrl”: embedUrl, “id”: reportId, “permissions”: 7, “uniqueId”: “87oes” } }; iframe.contentWindow.postMessage(msgJson, “*”); }; }());
OK, so that’s not the recommended way to do the Javascript part of the embedding. But that’s what’s going on under the hood and doesn’t require any other JavaScript libraries. Check out this great article for tons more details.
To do it right, use the PowerBI Javascript library and do it like this.
That’s it! Happy embedding.
Possible Issues
Issue: Could not load file or assembly ‘Newtonsoft.Json, Version=7.0.0.0
Solution: Manage NuGet packages for Solution, Install 7.0.1
Sample Project
Here’s a great sample project that includes all the code necessary to create App-Owns and User-Owns projects.